The new, testbed RT-320, whilst having its faults, also had a couple of advantages over my 'good' radio. First, it has all the front fins. Second, it has its original tuning chart. It also had some of the knobs better than my good set.
And so began the refurbishment of the good set. The key element of this is the transfer of the front panel from the testbed radio. Since this is a major undertaking, I decided a total paint job was in order at the same time.
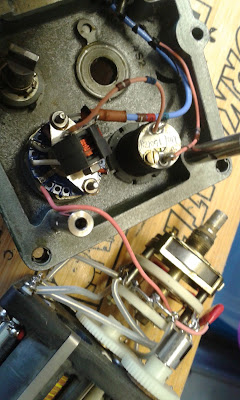
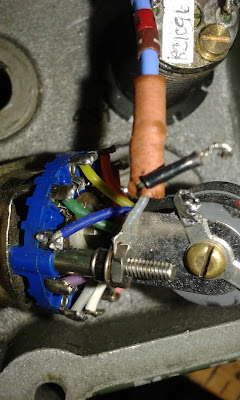
The first task, bearing in mind both radios were open, was to remove all the knobs. This in itself was a big learning curve! Some levered off easily, a few others were quite stuck and needed careful manipulation. Then, the nuts had to be undone. The photos here show the 'good' radio, the 'testbed' set had already been dismantled at this point and the front panel removed.
With all the nuts and washers removed, the delicate tasks of removing the internals could begin. I decided it was safest to start with the ATU. The main body of which came out easily once its four screws were removed. This remained attached to the LOAD switch.
The thin coax to the LOAD switch was then unsoldered, note being made that the center goes to the tag with the Blue wire, and the screen to the solder tag screwed to the pot core coil.
With that done, the whole ATU assembly was carefully lifted out, along with the drive coupler for the TUNE knob. Finally, the two wires to the meter were unsoldered. I have left the meter in place as I have no suitable tool to remove it with.
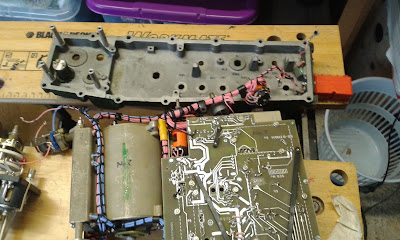
Placing the ATU assembly aside, the photo below shows just what I was up against next! It was clear that the safest technique now would be to remove the screws holding the turret tuner and the main board assembly, and gently ease the front panel away, to gain access to the cable clips.
No photos can show just how tricky this proved to be! Gently easing the boards and modules away, pushing the controls through, undoing and removing the screws without losing any or dropping a washer into the works!
There was also the need to collect up the seals from each control shaft. One important thing to note is that the tuning shaft is not part of the turret unit, but instead used a loose pressure fit bushing, very easy to drop and lose! But eventually I had the front panel away from the radio, attached by a few remaining wires
These remaining wires connect to the battery terminals. Unfastening the screw holding the +ve terminals to the front panel, its essential to take care not to lose the insulating washers and bushes.
The -ve terminal required the removal of its securing nut, in very tight confines, in order to disconnect the wires, which also needed bringing out form under the smoothing capacitor.
But, eventually it all came away. The 'good' front panel from the other radio, liberally covered as needed in masking tape and sprayed with primer, will eventually fit on this radio. The front panel removed above, has already been re-assembled onto the 'testbed' radio. One small mistake was made when I put that back together, in that I forgot to replace the seals! So the testbed radio is not waterproof! Refitting is pretty much the careful reverse of dismantling, with a few added continuity tests to check for any mistakes! However the testbed radio, with its new 'old' front panel, is back together on the bench and working exactly as it was before.
Another aspect of this job was to give the 'good' radio the better main housing. But, the whip adapter on this one was not as good as the 'good' radios unit, so that had to be changed over as well. This is a surprisingly complex bit of kit, and to get to the main fasteners requires the removal of a screening plate inside the housing, lots of tiny screws in a very confined space
The various part of the antenna adapter are shown below. This doesnt show the odd shaped internal plastic housing, nor the thick PTFE insulated silver plated wires connecting it all up.
But now, I have the best front panel, the best main housing, the best whip antenna adapter, and the best back panel, all ready to fit on the best radio. I have made a start on the repaint of the front panel, but have run out of brush cleaner, so cant proceed with that until I can clean my brushes.
In the meantime, ive completed the balance charger cable for the LiPo battery.
Ive also started the paintwork refurb of the PRC-352, starting with the amplifier, which needs quite a bit of 'touch up' but not a complete repaint, and the SURF, which just needs a little touching up in places. The main radio needs quite a bit of paintwork, so will get a proper dismantle and prime job
Im also looking at how to program this little beauty - a Yaesu VX-2000V VHF 25W FM mobile. 40ch PMR set but very small. It should go on 2m nicely, and make a nice compact little VHF manpack!
But as expected other jobs are getting in the way. Ive had to repair my watch, which needed a new strap and, as I found out this morning when I was late for work, a new battery. Luckily the strap and pins was awaiting my arrival home, and the back press for refitting the back of the watch arrived at work today. So I have a nice working repaired watch now.
The VX-2000V programs using a very similar serial to TTL converter as the old Kenwoods, just with a different plug. So, ive made a plug up, and will wire that to sockets to fit the Kenwood KPG-22D programming lead, and with any luck that will work.


No comments:
Post a Comment